posted July 11, 2008 04:45 PM
Shane you'll be happy with the 43, I even tried 44T but was redlining 5th thru the traps.
My best et was @ 63" with 16-43, you can really whack the throttle and just about let the clutch fly with this set-up.
I was able to run 9.50s real consistantly with just what you have there.
You are probably a better rider than me and will go quicker.
____________ Texas Mile 200.256mph - Oct. 2007 (Update 202.577mph Oct 2008) NOS assisted ECTA Ohio Mile 195.132mph TexasMile 2012 199.9 mph all motor!
Streetriders Shootout 2008 series Pro/ET Champ!
Streetriders Shootout 2007 Series Pro/ET Runner-up!
posted July 11, 2008 04:54 PM
I'm really just an average rider. I will definitely be happy if I can get to the 9.50's! I just squeaked into the 9's for the first time on my gf's '03 1000. It sits at about 62" and has +2 gearing. I could have used some more gear at my weight, and better clutch control, for sure.
Here is a 10.03, and I did get the 9.99 later that day:
posted July 11, 2008 07:32 PM
Shane you look to be a big boy ... I would go 16/43 like Halvefast said ... You should be fine with that gear...
____________
Smokin Performance Cycles..
Tampa Bay , FL .. Brocks Performance Dealer ..
Gen 2 ZX14R Best ET 8.43 , Best MPH 164.95
posted July 12, 2008 08:48 AM
It's like 120 degrees in my garage today. I decided to do a quick outside job where it's cool (like 90).
For LSR I need a metal chain guard. I am using one by Tiger Racing. It comes in the bare aluminum, which is a little flashy for my taste:
I went ahead and gave it a satin black spray can paint job. It only came out "ok", so I will have it powdercoated later. Powdercoat is a better choice around any cleaning solvents you may use on the chain (like WD-40, my favorite). But this will do for now:
Maybe when it cools off later I will tackle something else.
posted July 12, 2008 03:43 PM
Edited By: shane661 on 12 Jul 2008 16:48
It cooled off to about 100 degrees in the garage. I wanted to at least start on something else today. I am running out of time; only 5 full days before I need to load the bike on the trailer for the Jason Miller seminar.
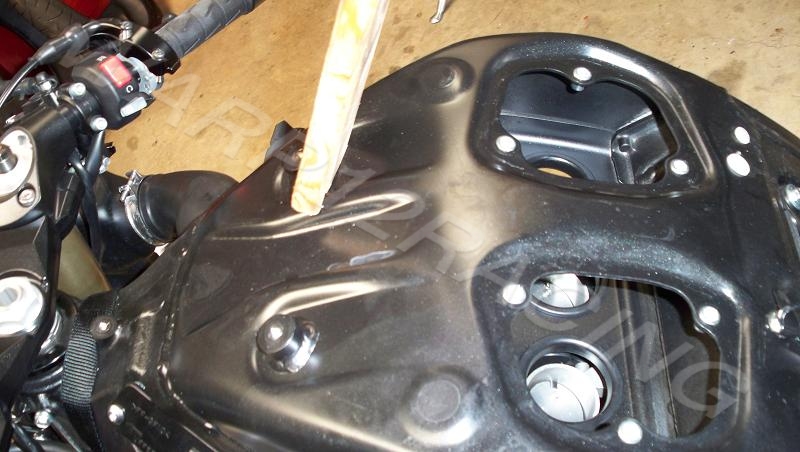
I decided to take the bike down to the point where my next project could be actually removing the secondary throttle plates.
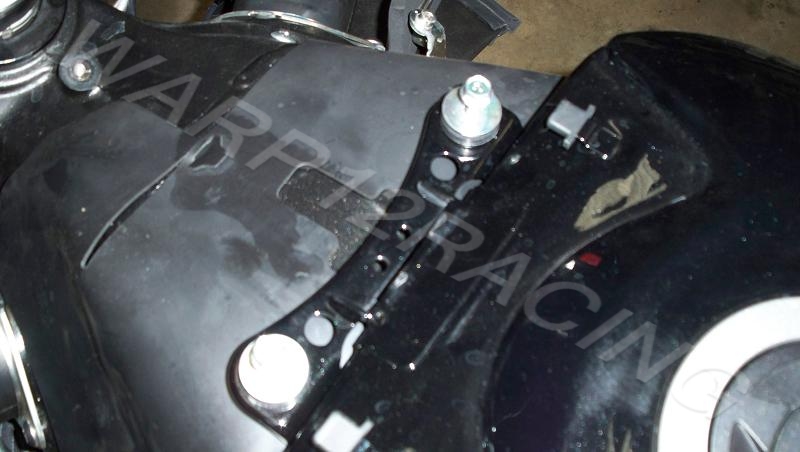
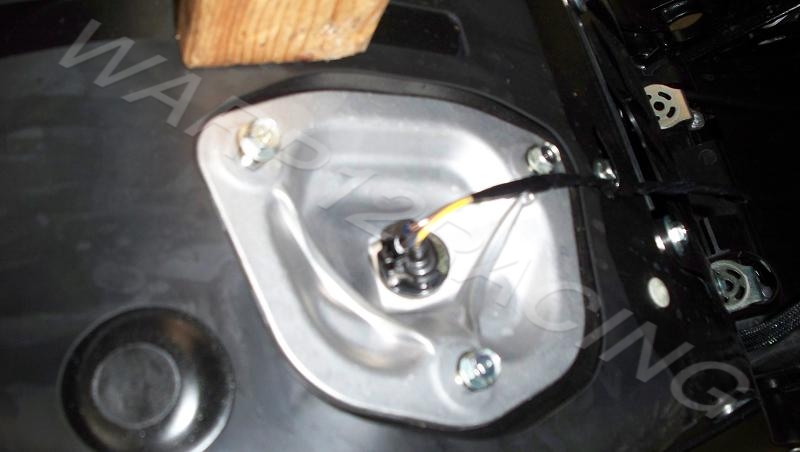
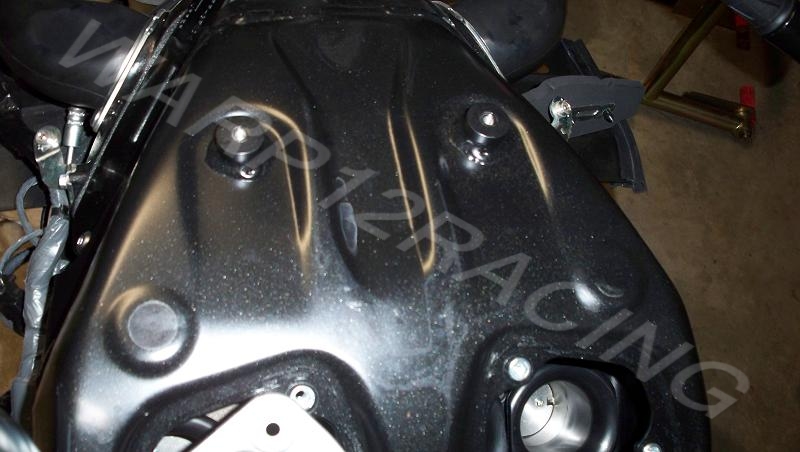
Here are two pictures showing the 4 bolts holding the tank down. I will need to get under the tank in order to access the plates:
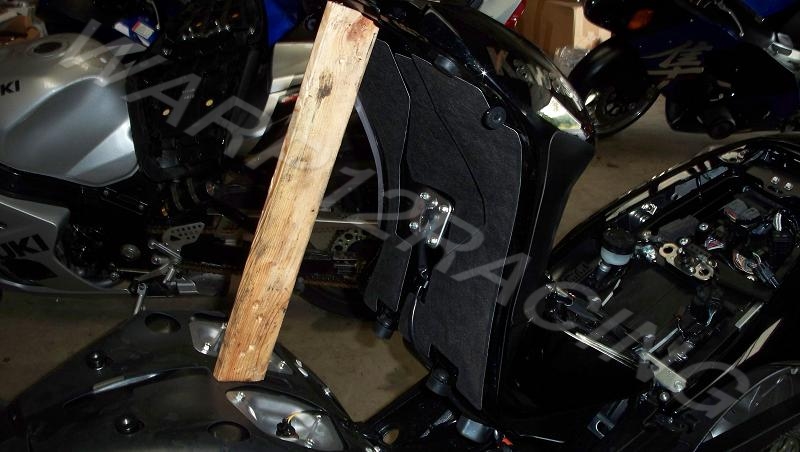
I didn't want to remove the fuel line and such, so I needed a way to prop the tank up. The tank is not hinged in any way, nor is there a prop with the bike. You can purchase an aftermarket hinge, but I went the cheap route:
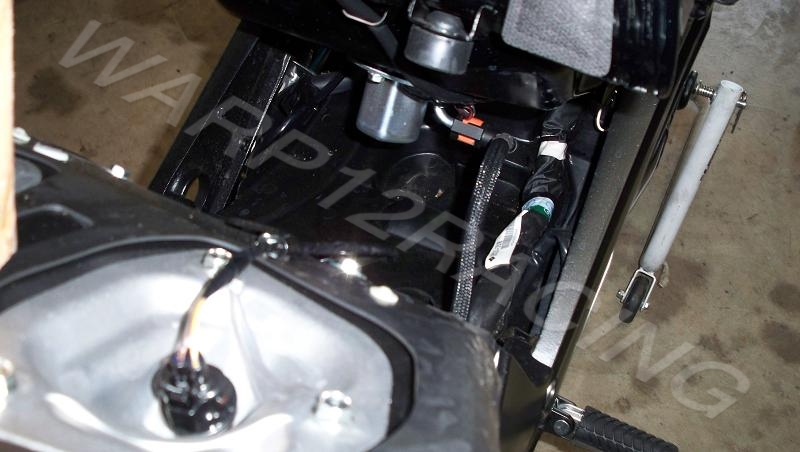
Here you can see down in the bike a little. You can see the protruding fuel pump on the bottom of the tank:
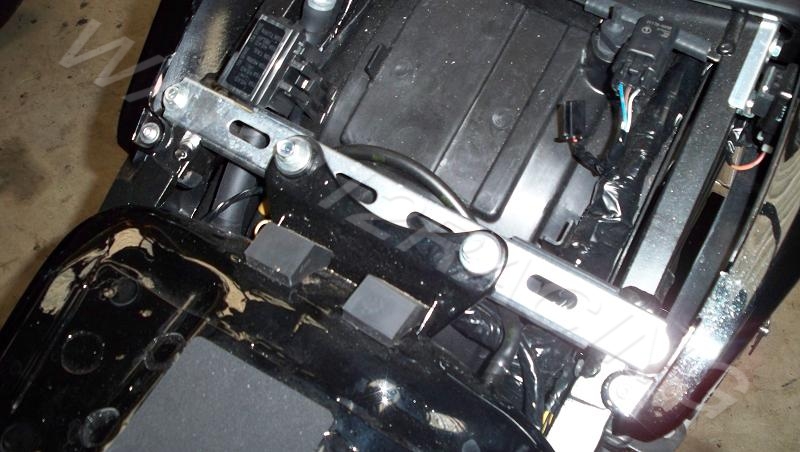
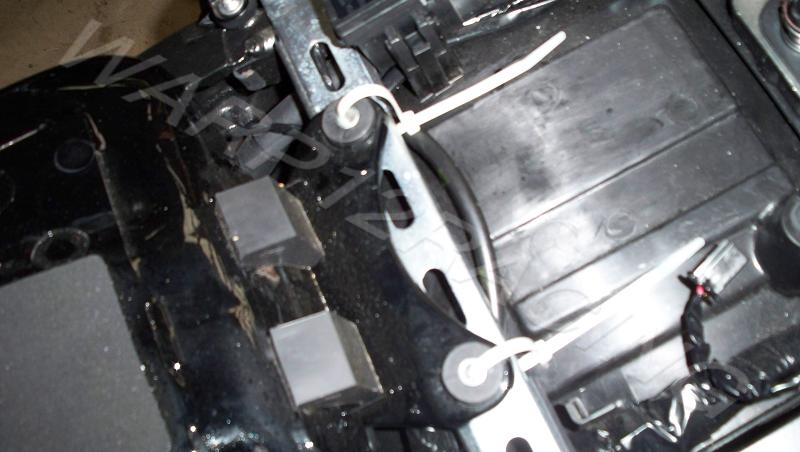
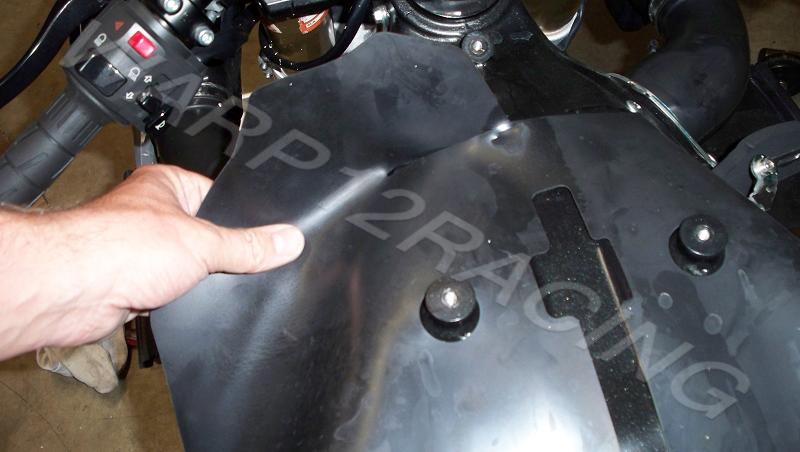
Here is a plastic plate behind the battery which should make accessing a few electrical pieces easier:
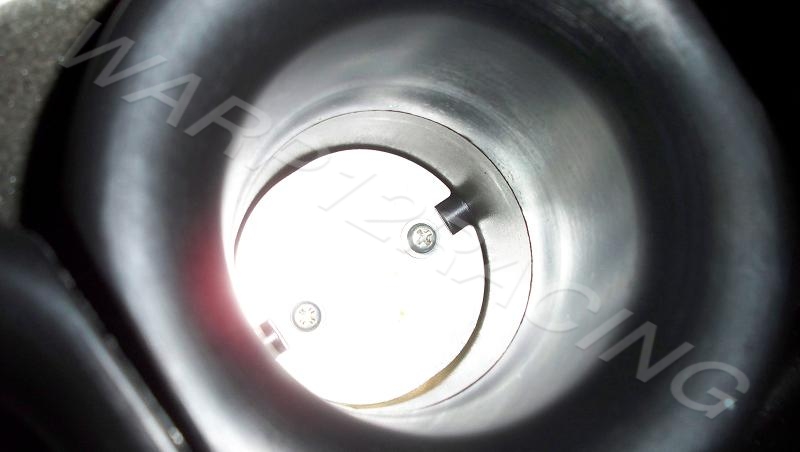
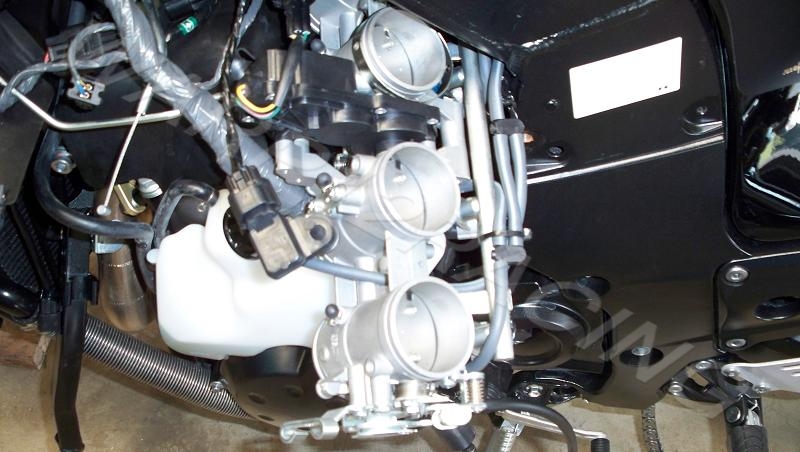
The intake air temperature sensor is located in the left side inspection plate:
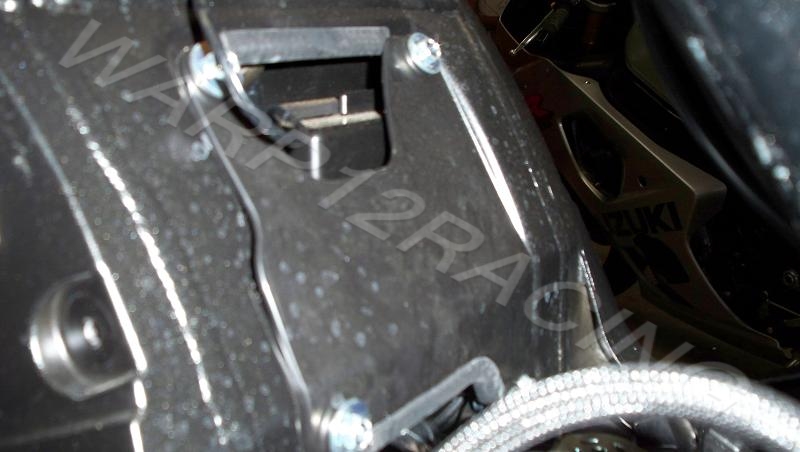
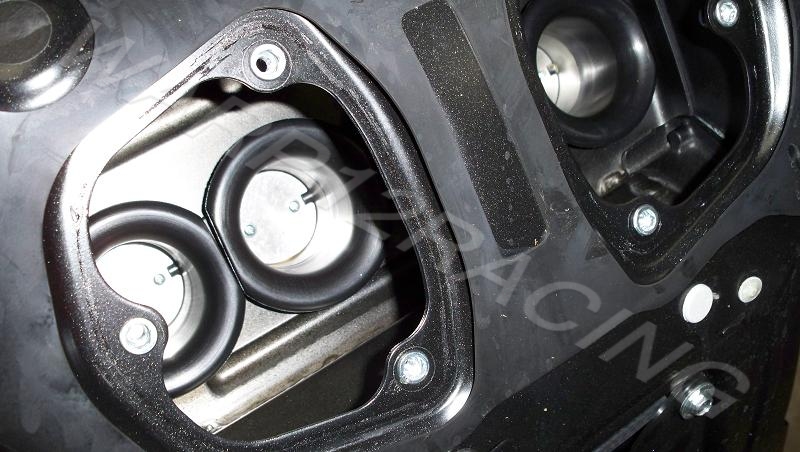
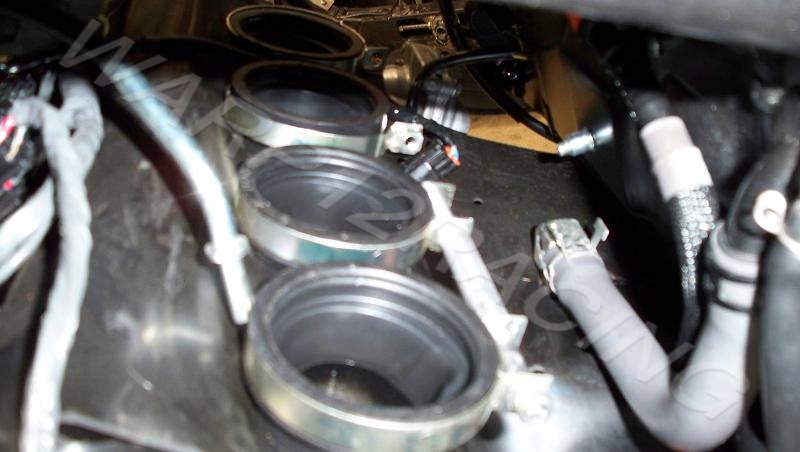
Both access panels removed and throttle bodies visible:
Close-up of one of the secondary plates:
I need to procure the perfect scewdriver and a couple of other items before continuing with this project, so that wraps it up for today.
posted July 13, 2008 07:41 AM
Edited By: shane661 on 13 Jul 2008 08:54
I've been working on the bike daily for a week now, and here is where the project stands:
Steering Damper
Exhaust 100%
Power Commander
Sprockets 50% (still need to install countershaft sprocket)
Catalyst Seat
Mirror Block-Offs 100%
Double Bubble Windscreen 100%
Kill Switch
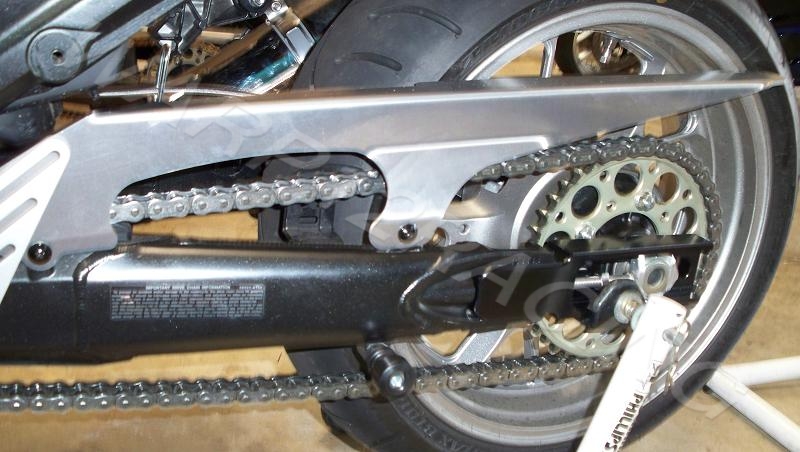
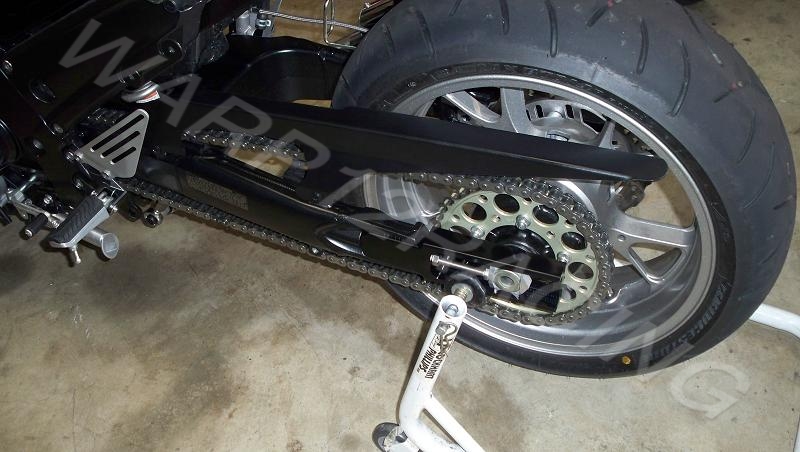
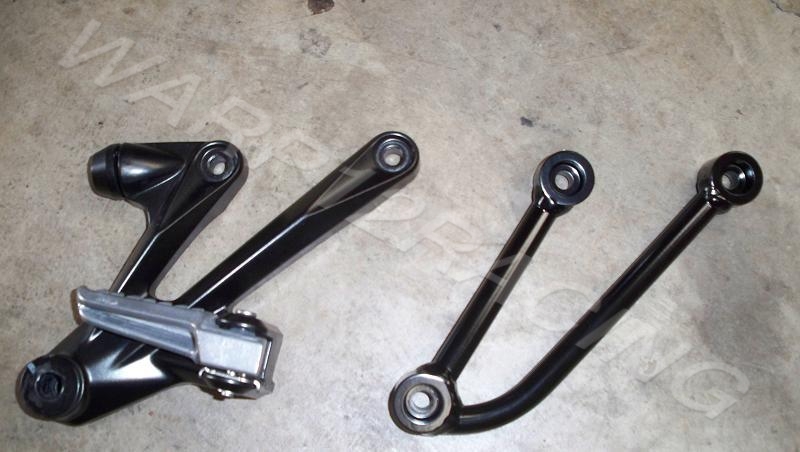
Swingarm Extensions 100%
Lengthened chain 100%
Metal Chain Guard 100%
Adjustable Sidestand 100%
Lowering Links 100%
Front Strap
Fender Eliminator 100%
BMC Filter 100%
Innovate LM-1 Data Logger
More added to do:
Remove Secondary Throttle Plates
Install Speedohealer
Install 3 heavy clutch springs (more for feel than anything else)
Raise forks in triple clamps
Replace Tires
So far 70+ pictures posted...and a lot more to go. Like most of these projects, it is evolving quite a bit along the way. I'm learning a lot about this bike, most of it positive.
posted July 13, 2008 04:19 PM
very impressive post from the details to the pics( i especially like the pics). very nice bike shane and i'll be watching the rest of the build.
posted July 14, 2008 04:42 PM
Edited By: shane661 on 14 Jul 2008 17:46
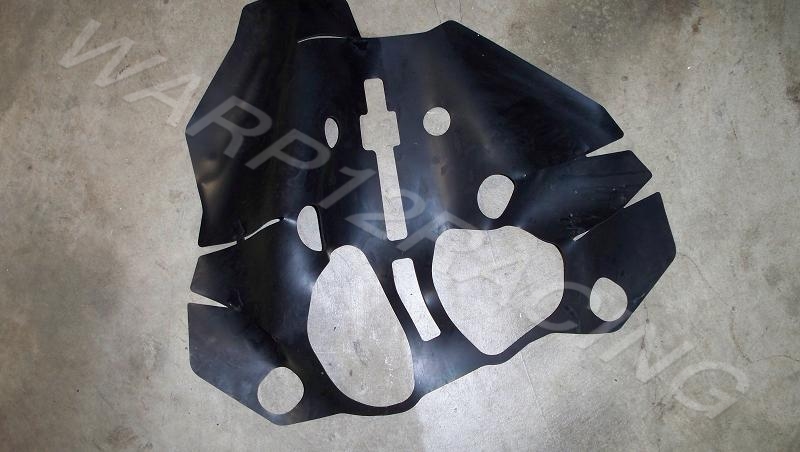
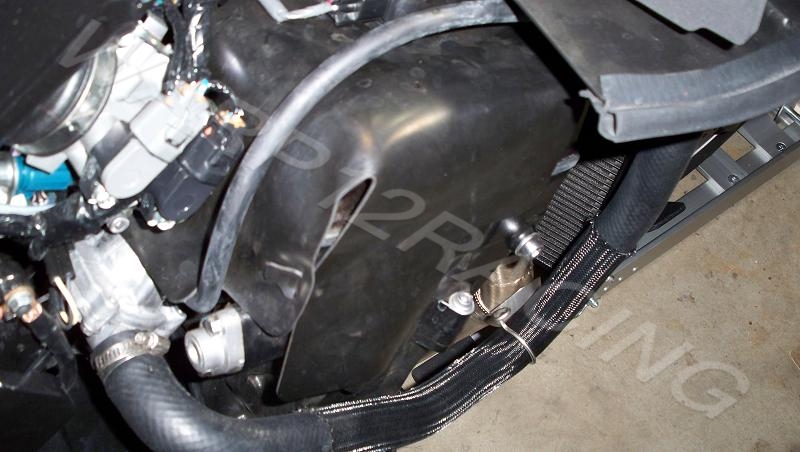
Another slow couple of days. But a couple of points of interest. This bike has way more vibration and sound damping material on it than the 12R. I plan to remove a whole lot of it. It's great for a stock bike...but not so great for a bike that you want to race.
The first piece to go is this rubber pad under the tank:
The rubber padding is thick and heavy. As far as I can tell from the bathroom scale, it is heavier than my Innovate LM-1 data logger!
Some people may say, "What's does a pound matter!??". Say that enough times and you will be accelerating significantly slower! I have added weight in some areas (swingarm, data logger, chain, etc). It's nice to be able to offset some of that added weight.
The one that I really want to get rid of is here:
Talk about a heat blanket! Admittedly it may keep some heat off of the bottom of the frame (airbox), but that would be better addressed by insulating the frame, IMO. The 14 is a hot runner, and a rubber insulator around the engine probably does not help.
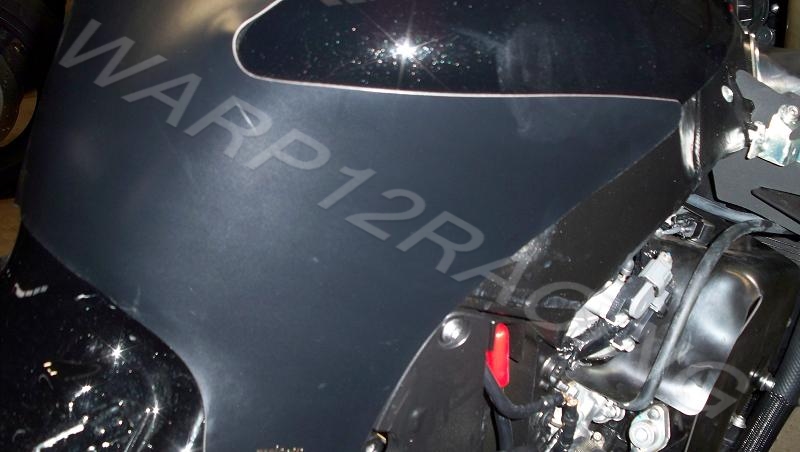
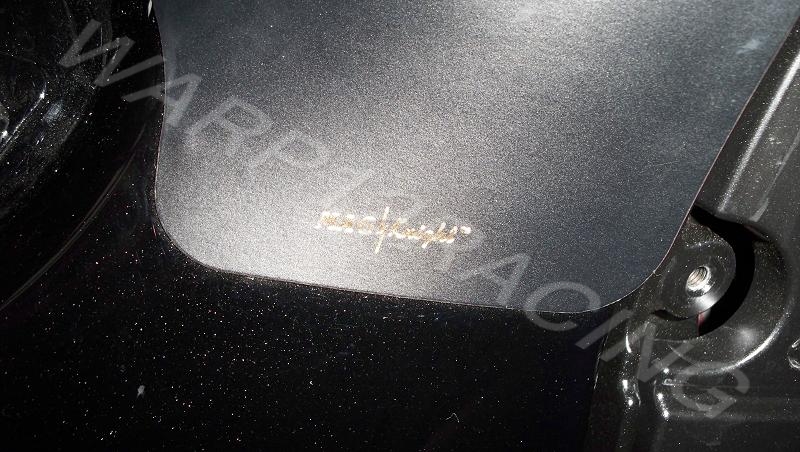
Someone PM'd me about my tank protector. It is a magnetic one made by Mag Knight. They tend to fit a little funky in spots, but for me it is just a tool to avoid scratches and not a vanity piece:
I don't have a day off until Wednesday; I am hoping for some major progress mid-week.
posted July 16, 2008 01:05 PM
Edited By: shane661 on 16 Jul 2008 14:21
Okay, more progress today. When I last left the bike, it was ready to have the secondary throttle plates removed. Well, I attempted to do that today.
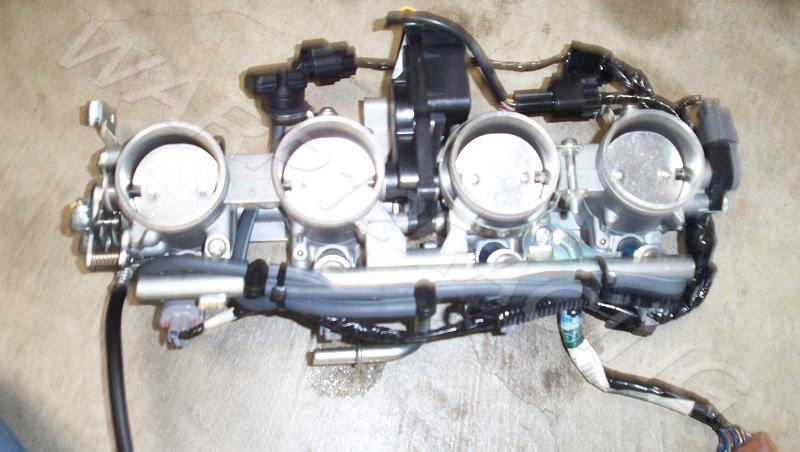
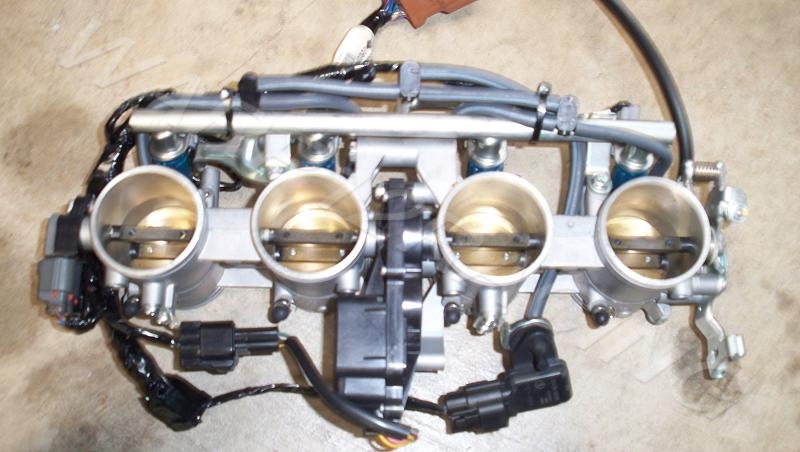
The 2nd screw stripped on me. I know a lot of people have does this without incident, so I am sure it was a mistake on my part. I didn't like the way I couldn't get the screwdriver straight on some of the screws, so I decided to pull the throttle bodies to remove the rest of them. That way I would have a better shot at removing the other scew that I damaged, as well.
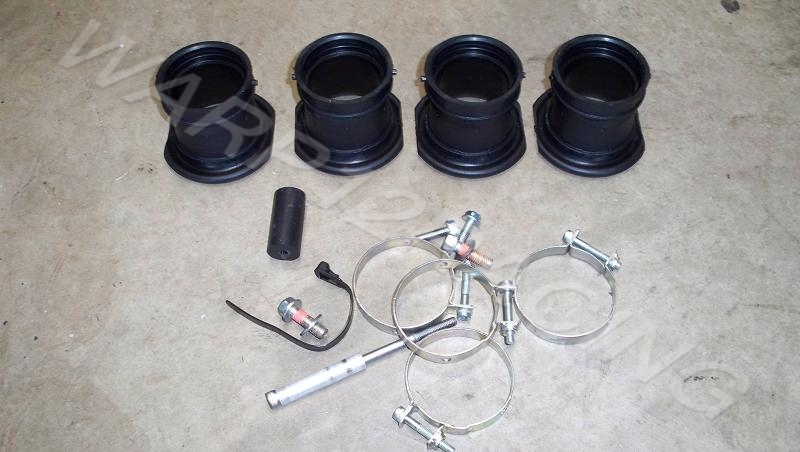
Here I have removed the velocity stacks:
They were pretty easy to get out. There are a lot of connectors, a fuel line, a frame brace, and clamps that have to be removed to get the bodies out of the frame. It is detailed fairly well in the service manual.
Once the bodies were out, I was able to remove the other 7 scews easily. The 8th one, the damaged one, was very difficult. I had to cut a groove in it with a dremel and use a slotted screwdriver to get it out. I almost couldn't get it.
Now that I had the room, I removed that engine blanket that I spoke about earlier in the thread. After trying to get it out intact, I finally gave in an tore it in some select spots to remove it. There is a lot of stuff running through the holes in it!
posted July 16, 2008 01:19 PM
Edited By: shane661 on 16 Jul 2008 14:27
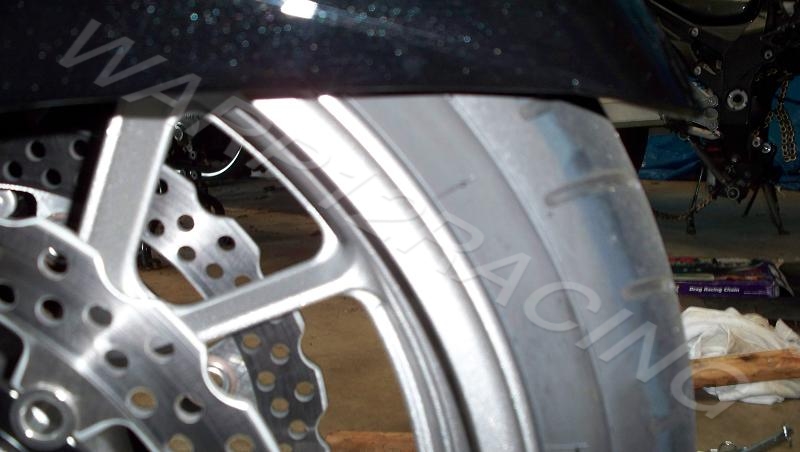
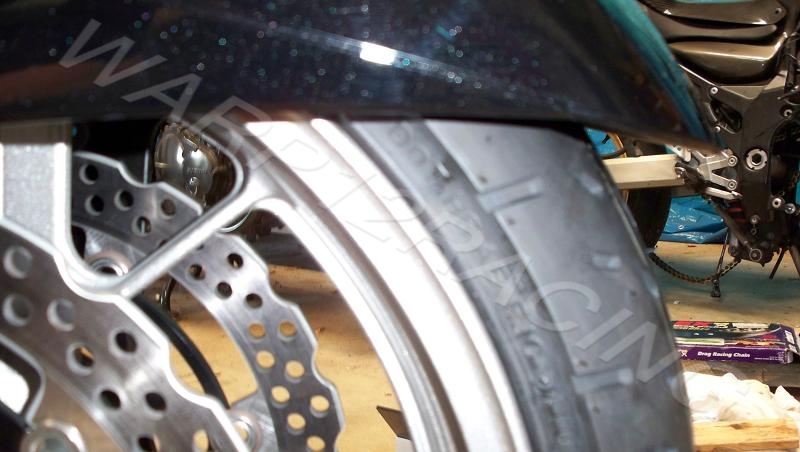
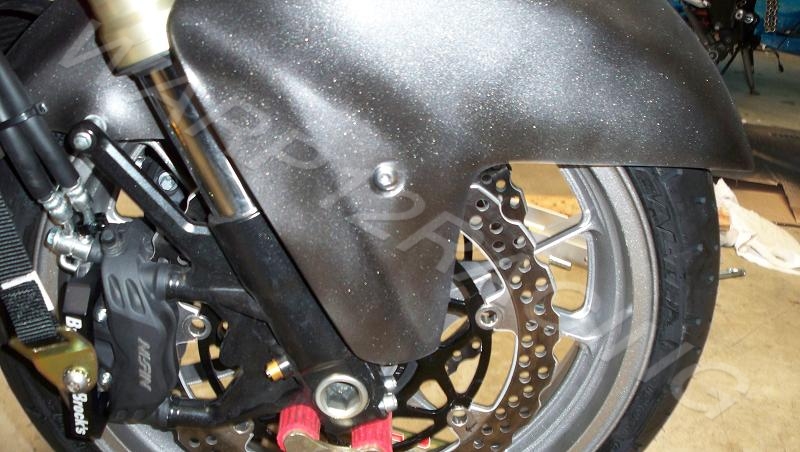
I got the Shinko tires mounted. The sizes I will be using are a 120/60/17 front and a 190/50/17 rear tire. I like using the 60 series front because it is lower profile and brings drops the front a little.
I noticed that even with the stock tire there is a lot of gap between the tire and front fender:
That gap gets larger when you install the lower tire:
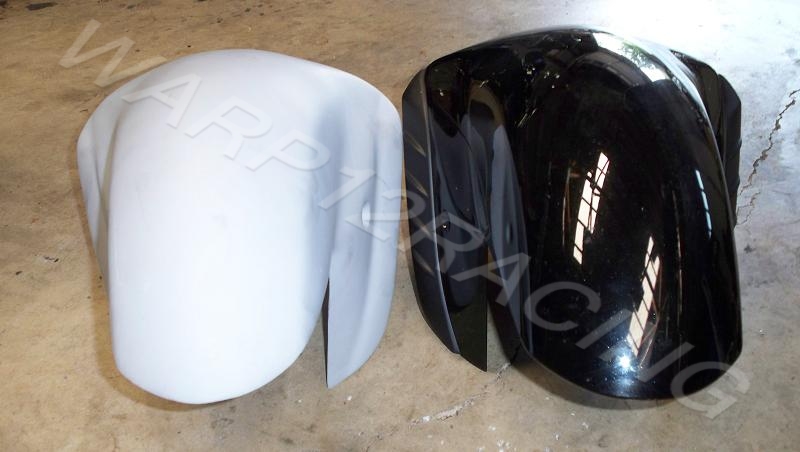
By installing a lowered front fender, I can lower the bike more without the fender contacting underneath the fairing. This can be dangerous when you land a wheelie, or when you get hard on the brakes. It can restrict movement of the steering or, at minimim, damage the fairing and/or fender.
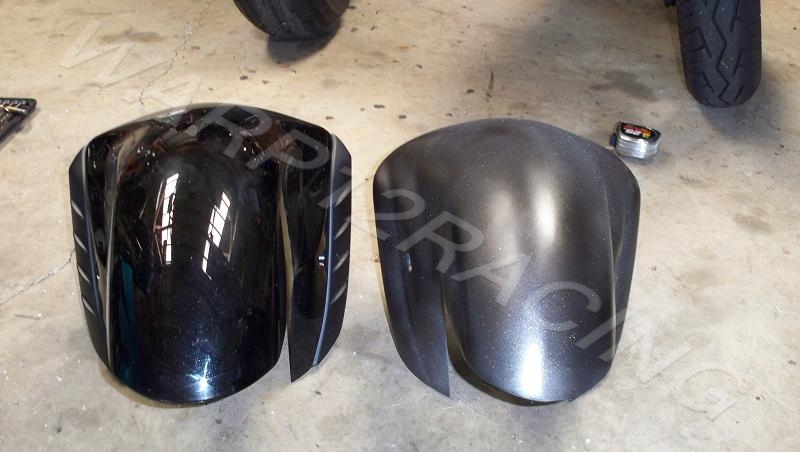
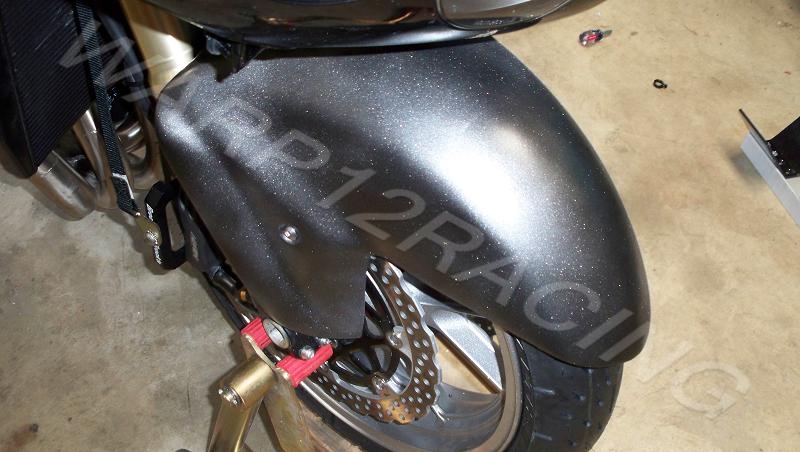
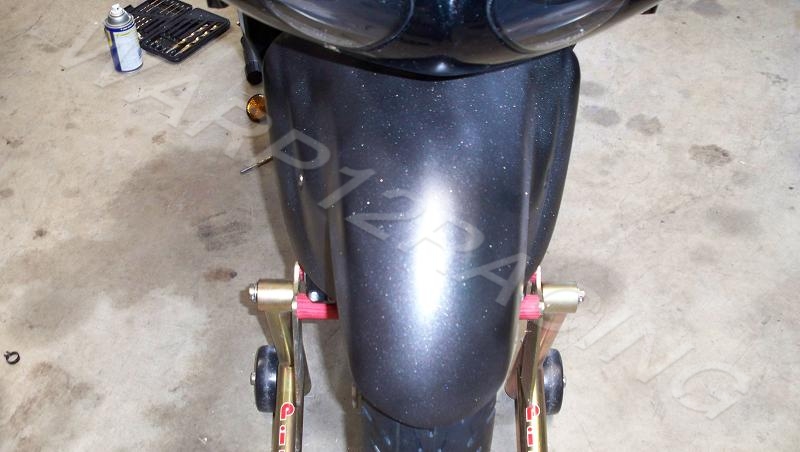
I purchase a fiberglass low profile fender from Catalyst. In order to install it you have to drill holes in the proper area and test fit everything before applying paint. You can see here how much lower it is than the stock piece:
I used a spray can to paint it after drilling it and test fitting. It came out more of a charcoal color than black, but that is ok (for now). It is for racing and will get various event stickers on it anyway:
I also installed the Brock's radial mount strap kit:
You can see the smooth sides of the fender, no stylized "louvers" on it:
I am done for at least a few hours. Hopefully tonight I can do a little more. I am coming down to the wire. I may have to skip racing it on Friday.
posted July 17, 2008 10:49 AM
Edited By: shane661 on 17 Jul 2008 13:23
Tomorrow is when I want to race the bike, so I will have to keep this update relatively short.
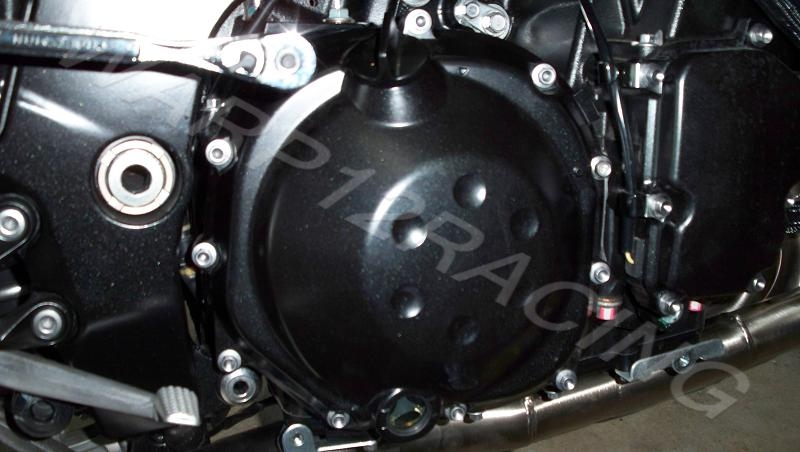
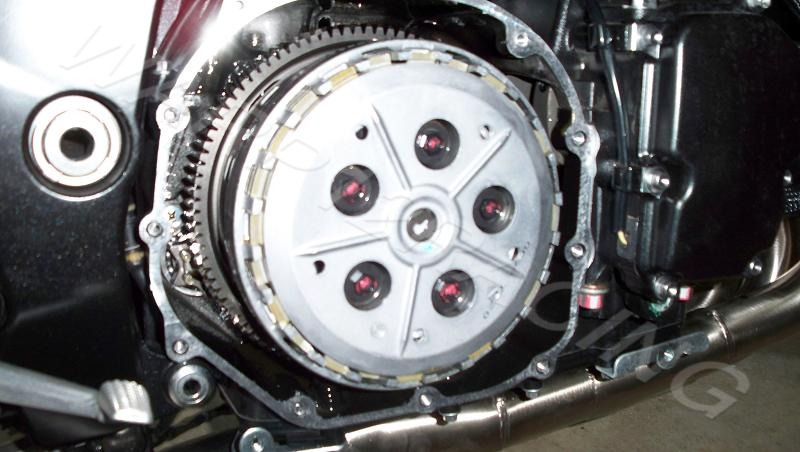
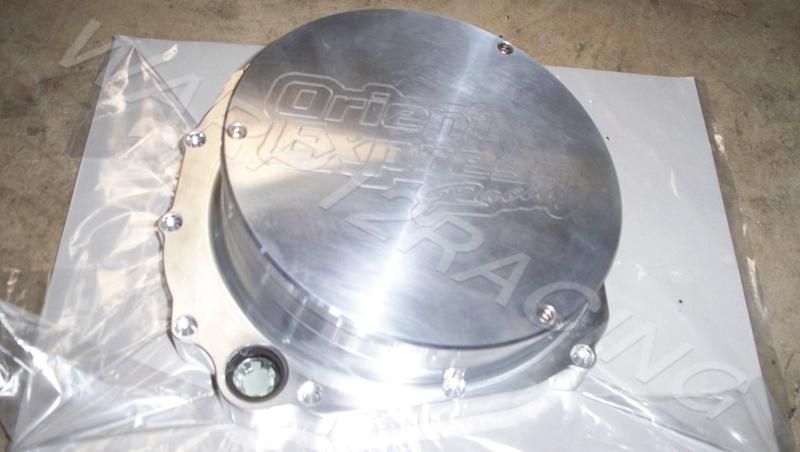
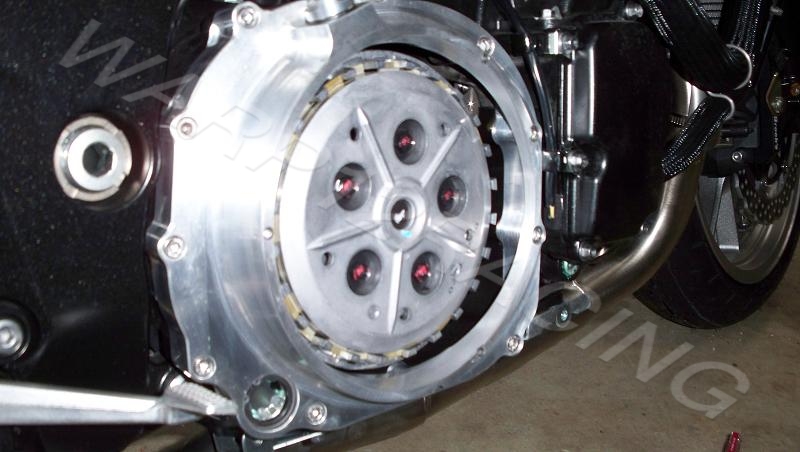
I am installing 3 heavy clutch springs. I decided that I wanted a quick-access plate for the clutch. I ordered one from Orient Express. It is well made. Before you install one of these, make sure you clean it thoroughly inside and out. Mine was fairly dirty from the machining process.
Now the clutch can be accessed for replacement/inspection with three allen screws!
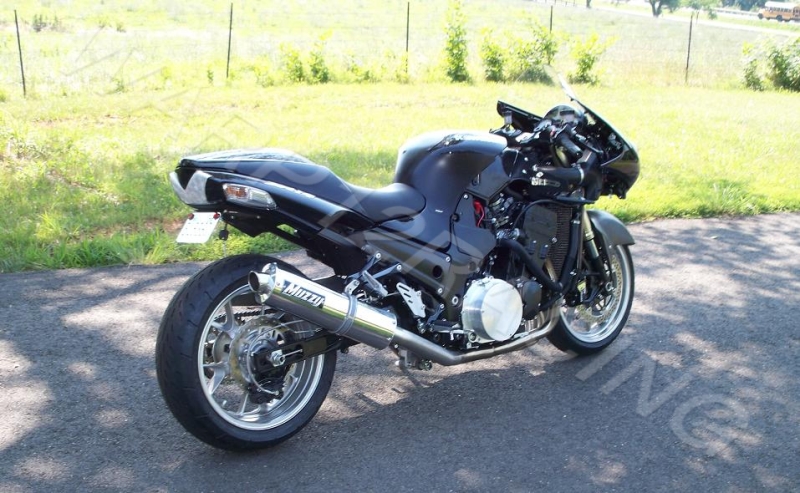
Everything is coming together pretty well. Here is the bike before a 100 mile ride this morning:
Not bad, considering that it was bone stock 9 days ago! I am leaving the bodywork off for the track so that I can be on the lookout for any air, exhaust, or oil leaks, etc..
With the secondary plates removed, this bike is a whole new animal. Very powerful and smooth.
This is likely the last update with pictures until I get back from the races. I hope to make a few good passes and log some data with the LM-1, This is like taking a whole new machine to the track, so there are sure to be some teething issues. In fact, the bike just today has 1100 miles on it!
posted July 17, 2008 03:36 PM
Nice job shane ... Keep them pictures coming .....
____________
Smokin Performance Cycles..
Tampa Bay , FL .. Brocks Performance Dealer ..
Gen 2 ZX14R Best ET 8.43 , Best MPH 164.95
posted July 17, 2008 04:54 PM
do some test riding with the lower profile tires to make sure they handle ok before you whack it too hard. brock had some highspeed instability when he changed the front tire on the busa, but that is a different bike. the pics are great, keep up the good work!
____________
2006 Black ZX-14,6 inches over,16/42, flies out,BMC Street Filter,Brock's Street Meg,Brock's Radial Mount Strap,PClll with Race map,Dynojet LCD w/Techmount, ZX-14 fender eliminator,Pilot Power2CTs,Speedohealer,Pazzo Levers,Cox Radiator Guard, Garmin Nuvi 265WT
posted July 18, 2008 03:18 PM
Edited By: shane661 on 18 Jul 2008 16:18
I am back from the track. I only made 3 passes, and none of them were clean. I have to chase some mechanical gremlins, starting tomorrow.
I did set a new personal best 60 ft. in that short amount of time, however. I went 1.58 on my 3rd pass. My first time ever in the 1.5's. I was only running +2 on the gearing as well. The bike has so much torque that it pulled through that gearing easily.
Hopefully I can get things sorted out by the end of the month and get some quality seat time.
posted July 19, 2008 05:58 PM
Edited By: shane661 on 19 Jul 2008 19:28
As some of you may have read in the Dragbike forum, I had some issues with a clanging sound at the top of first gear while at the track. I adjusted the chain very taut and still had the same problem...and discovered some other bad stuff:
"Sadly, that was the end of the day for the 14. I took it back to the pits and adjusted the chain again only to find the right wheel spacer pressed into the wheel. The axle was seized in the wheel and I could not remove it. I also felt some crunchiness when I rotated the axle. Not good. I have not had it apart, but I suspect that the collar between the wheel and the sprocket carrier may have been left out during a wheel swap, leading to carnage. If so, I have learned a valuable lesson about working too many hours in a 100 degree garage. At any rate, the bike was still making that clanging sound even with a very taut chain...so I will have to figure that out once I fix the other damage."
Well, I haven't had the bike apart yet. But I can say with relative certainty that the chain was slapping...even when guitar-string-tight! Look at the launch sequence below...and the chain deflection, and snap back:
You can hear it hit in the video. Even super-tight it still was slapping!
So, I'm thinking that firming up the rear suspension will slow the reaction down and keep the slap from occuring. That will hopefully allow me to set the chain a little looser than I had it.
Even though the chain was very taut under test conditions (bike strapped down in the rear), I couldn't approximate the lash created by the engine power and speed of the suspension action.
Now if I can get the axle out of the wheel and assess that damage, I will be on the right track (I think).
posted July 24, 2008 06:32 AM
Edited By: shane661 on 24 Jul 2008 08:17
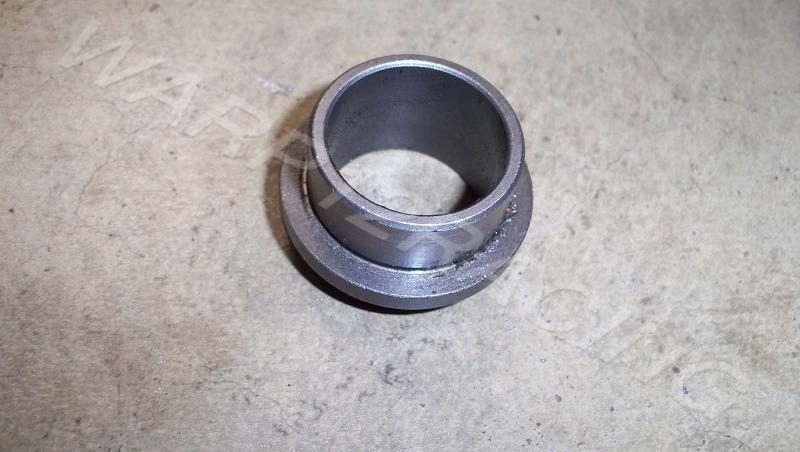
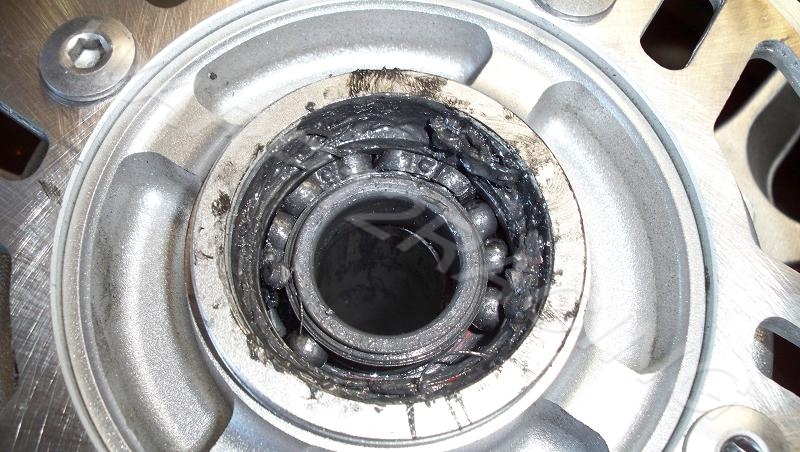
Well, I found the problem with the rear wheel. Just as I had thought, this spacer was left out:
By leaving it out, it created extreme pressure on the right side outer wheel bearing (it wasn't good for either bearing). This caused some damage to the axle which made it hard to remove:
The above photo is after some cleanup. If you have ever wondered what could happen if you left that little spacer out, I've got just the photo for you. Look closely for any minute signs of accelerated bearing wear:
Ouch! Yep, absolutely 100% my fault....I knew I was in trouble this morning when I located the spacer in question....before removing the wheel! Well, I'm glad I was able to get everything apart and there is a clear cause/effect. I already have a spare wheel sitting here and I ordered parts for a complete set of spares. Now I will be able to have a rear wheel/sprocket setup for drag racing and one for LSR. How's that for a positive spin on things?
posted August 02, 2008 05:22 PM
Edited By: shane661 on 2 Aug 2008 18:23
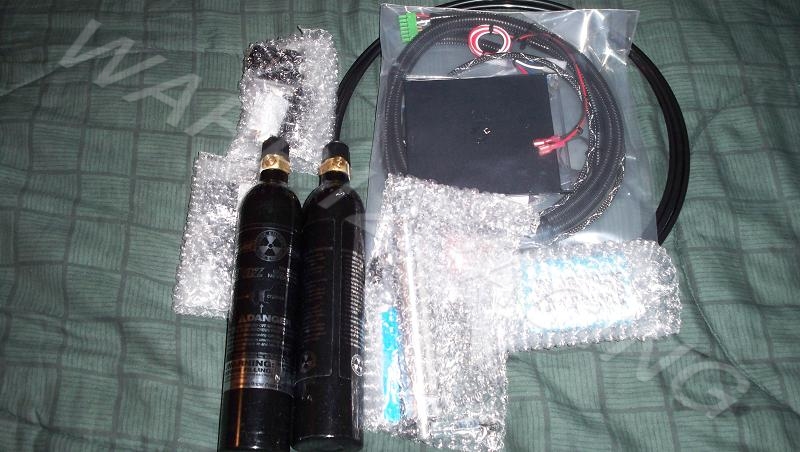
I know updates have been slow. I just haven't been very focused. But there are a few updates. I picked up some new parts.
First, I ordered a Cycle-Tek airshifter. I am really, really slow at shifting, even clutchless. I keep practicing, but the improvement is just not there. Plus, I really like using the airshifter on Racheal's Turbo:
I also picked up some PMR switches. One is a kill, with a toggle. The other has two toggles built in. This makes it easy to set up arming for say, nitrous and an airshifter. They both simply replace the existing half-moon clamp on the front side of the master cylinders:
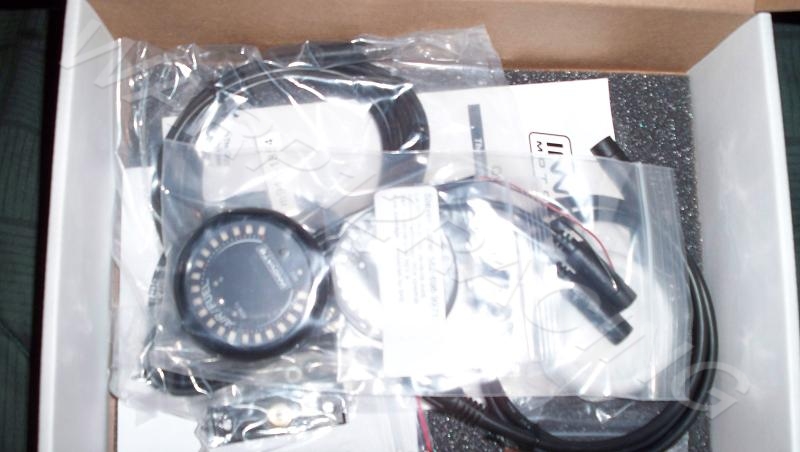
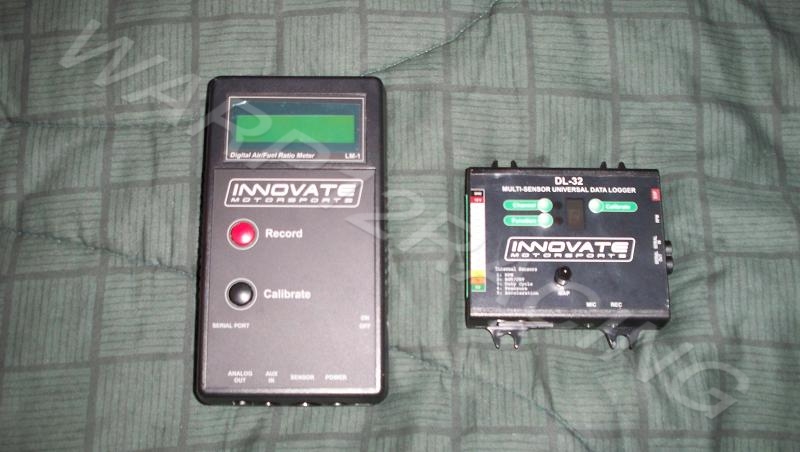
I also picked up an Innovate XD-16. This allows you to start and stop logging on the LM-1 remotely:
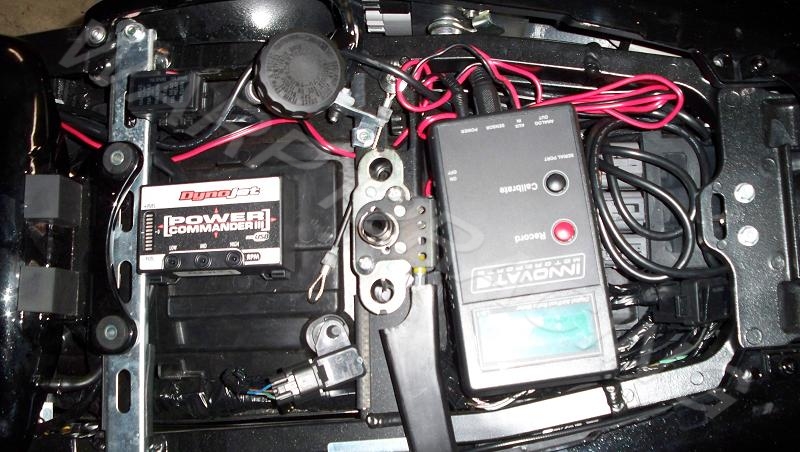
Speaking of the LM-1, here you can see where it sits under the seat, along with the Power Commander:
We also picked up a DL-32 setup for the turbo bike. It is nice and small. In fact, after next week I will be selling my LM-1 setup and replacing it with the $$DL-32 (overtime calling):
I'd rather run two of the same systems. That way I only have to learn everything 10x as opposed to 100x. Plus it will give us spares at the track.
Anyway, hopefully I will have some track updates soon. An unexpected kink kept the bike off of the track last Thursday.
posted August 02, 2008 07:00 PM
How much longer is that swing arm extension? And how do you get a longer chain? Example: Order it a certain length? Ordered extra links etc. I have the exact same bike here on the island of Kauai in Hawaii. Believe it or not, I have the only ZX14 on this island, I think. I get all my help on this line and I certainly appreciate it thanks everyone.
posted August 03, 2008 03:11 AM
shane,
a tip on using the motion pro tool to remove the old link
screw the large part in until it hits the side plate, THEN screw the lil punch screw in to push out the pin.
Less chance of buggering up the punch.
____________
This moderator uses moderation in moderation
posted August 03, 2008 03:52 AM
Edited By: shane661 on 3 Aug 2008 04:52
quote:shane,
a tip on using the motion pro tool to remove the old link
screw the large part in until it hits the side plate, THEN screw the lil punch screw in to push out the pin.
Less chance of buggering up the punch.
Maybe it's too early in the morning....but I can't quite picture what you are saying The included instructions were pretty hard to read, with no pictures.
quote:How much longer is that swing arm extension? And how do you get a longer chain? Example: Order it a certain length? Ordered extra links etc. I have the exact same bike here on the island of Kauai in Hawaii. Believe it or not, I have the only ZX14 on this island, I think. I get all my help on this line and I certainly appreciate it thanks everyone.
Those extensions are 2-7". You will have to order the chain longer than you need, and shorten it (see pictures)...or you could just use the 140 link chain and you will be at about 65" or so...pretty long wheelbase.
posted August 09, 2008 05:59 AM
Edited By: Shane661 on 9 Aug 2008 07:00
I posted this in another thread, but I figured I would include it here for anyone who is following this project in it's entirety:
I finally got the 14 back together and took it up to MIR. Racheal brought along her Gixxer as well. I got most of the teething issues squared, and the bike performed great all day. It needs fine tuning and some more setup, but it really impressed me today!
Before today, my personal best in the 1/4 mile was 9.96 on Racheal's bike. I had not been able to make a clean pass on the 14 yet. I suspected it might move my weight better than the 1000 (I am 230 pounds suited). Well, I was right!
I ended up running around 4 9.59's, and I had a string of runs (6, I think) all between 9.59 and 9.61. I also set a new personal best 1/8th, 330, and 60 foot. I was tired at the end of the day and having trouble hitting the 1-2 shift, but I ran two 1.52's.
Here is a 9.59 pass:
That is at 63.5" with +2 gearing and foot-shifting.
I have a bit of setup and tuning to do. The data logger told me the bike was pretty rich up top, and I need to address that...among other things. But I couldn't be happier with the bike's first real runs!
posted August 21, 2008 12:07 PM
Edited By: shane661 on 21 Aug 2008 13:12
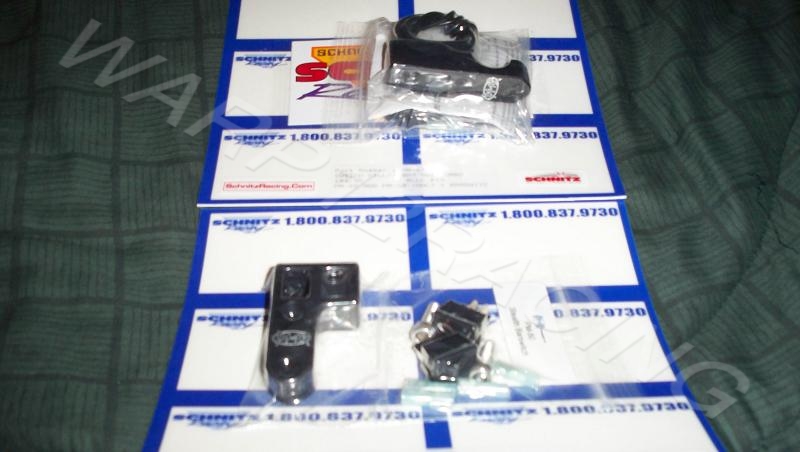
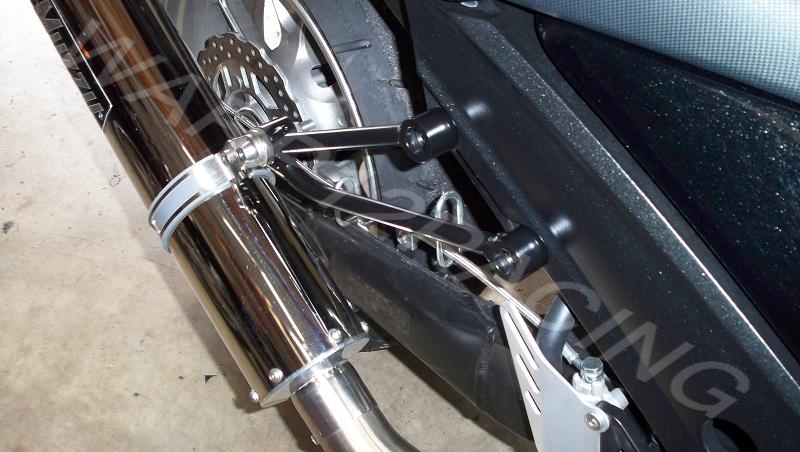
I never run any passenger pegs on my bikes (they aren't legal at Maxton and the bikes sit pretty low). After I removed the left-side hanger with the 4/1 exhaust I was looking for a lightweight hanger for the muffler. I ordered one from Schnitz, made by Two Wheel Werkz:
It is much lighter than the stock piece. It also looks a lot cleaner, IMO:
I had to raid my parts bin to find some washers and grommets to fit it. The stock grommets are too big. It will actually work without rubber mounting, but I happened to have a perfectly sized grommet, so I used it.
I went to the local 1/8th mile track last night and adjusted my fuel map at bit. I ran 117 mph at the 1/8th. I was pretty happy with that since I am historically 1-2 mph slower at this track than the 1/4 mile track I race at, under similar conditions. I think that with a little work I will see 120 mph in the 1/8th. I'll be pretty happy with that since I weigh about 230 suited up.
I know updates have been slow coming. That is because I am lazy these days, lol. I have here, still to install:
Factory Pro Velocity Stacks
Innovate DL-32 Data Logger
Cycle-Tek Air Shifter
PMR Billet Switch Assemblies
16T Countershaft Sprocket
Catalyst Step Seat
Heavy Clutch Springs
I should have a few more of these items installed within the next two weeks. I am scheduled for a 1/4 mile trackday on the 5th of September.
 HOME
HOME NEW TOPIC